
This tutorial will inform you about how to use iREAP POS PRO application for restaurants, cafes, or food stalls. Usually, a restaurant business requires a neat application display and a large enough button size, so that when making sales transactions it is more convenient and easy.
iREAP POS PRO provides landscape mode display facilities for android tab users, so this will make it easier for cashiers when making sales transactions.
ALSO READ:
The concept of a restaurant, cafe or warung business at iREAP POS PRO
But there are some Android tab specifications that need to be considered.
The following are the minimum specifications for the Android Tab that can be used on iREAP POS PRO

ANDROID VERSION 5.0/
Lolipop

RAM 2 gb

CAMERA DEVICE 2MP

DISPLAY 600 DPI
FOR LANSCAPE MODE
At the top of the notification, there is usually a rotation setting > click/enable rotate rotation
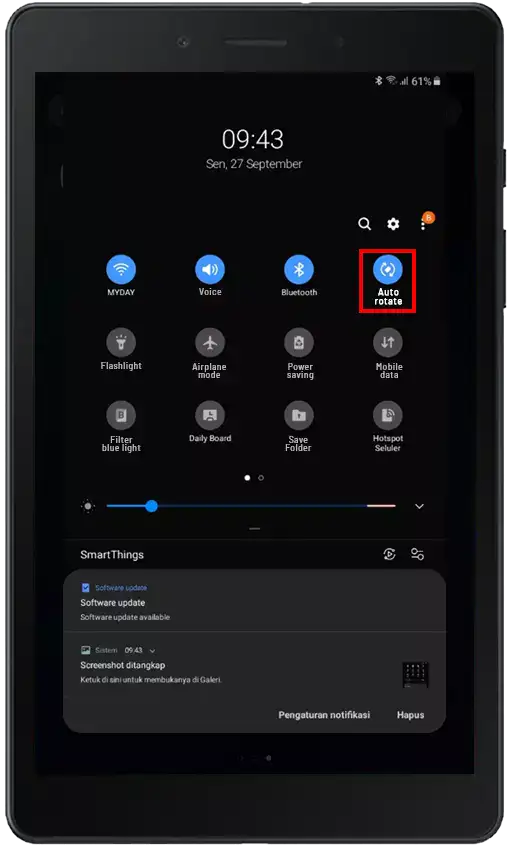
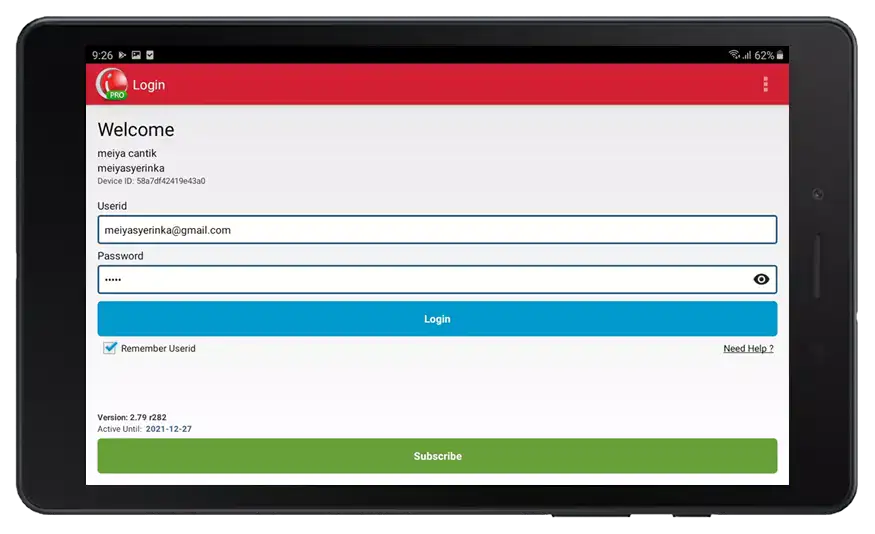
Tilt/rotate tab horizontally. Then open the iREAP POS PRO application > login
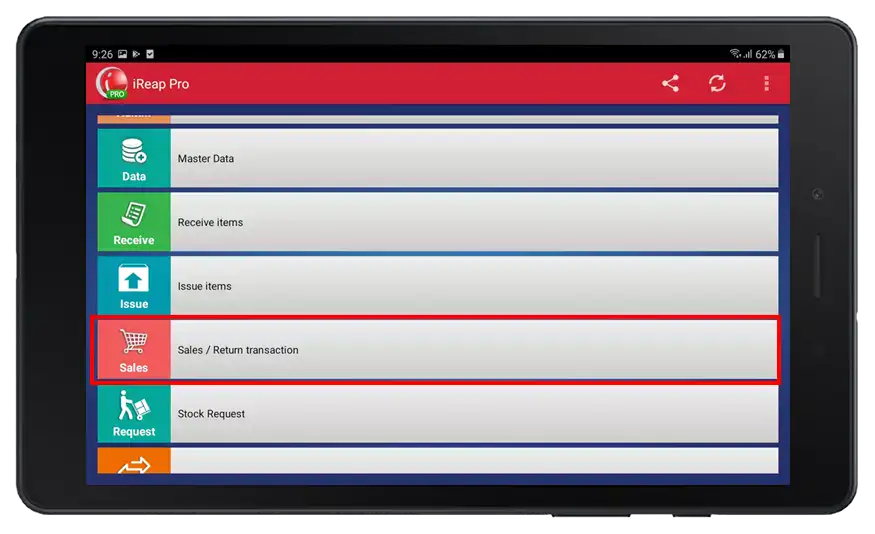
Enter the sales menu
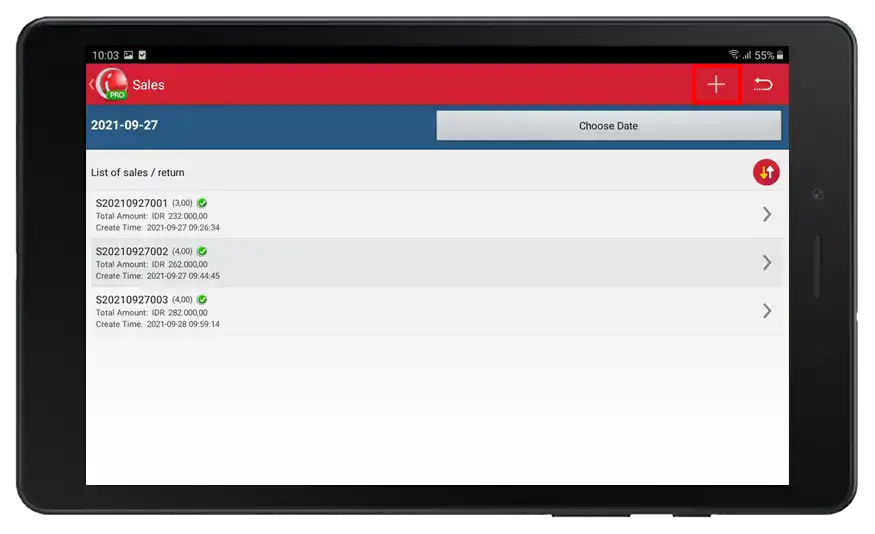
Click button ![]()
Choose products according to customer orders. Click  if the customer dine-in.
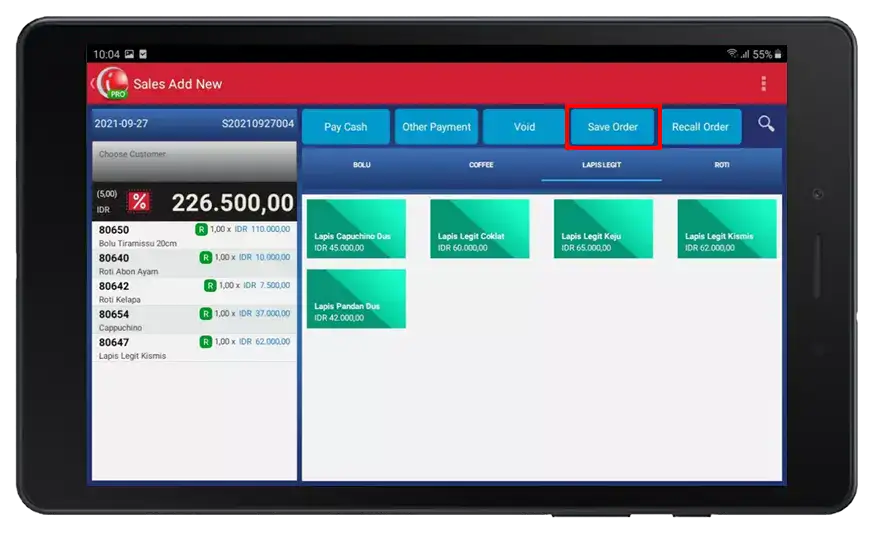
Provide a relevant name for example a table number, you can also print the order and place it on the customer's table or in the kitchen, click ![]() .
.
NOTE:
If the customer orders directly / take it home, ignore this step. For take away order you can jump to step 9
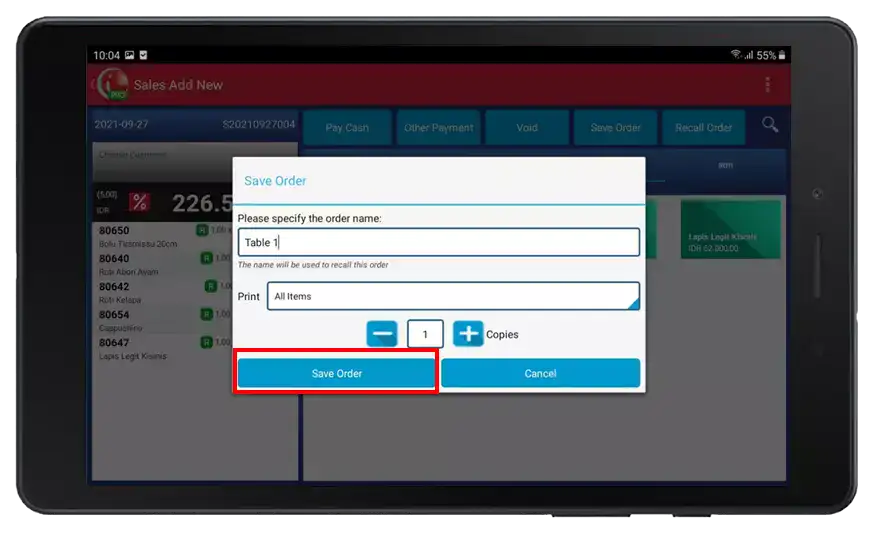
Click ![]() what if the customer wants to pay.
what if the customer wants to pay.
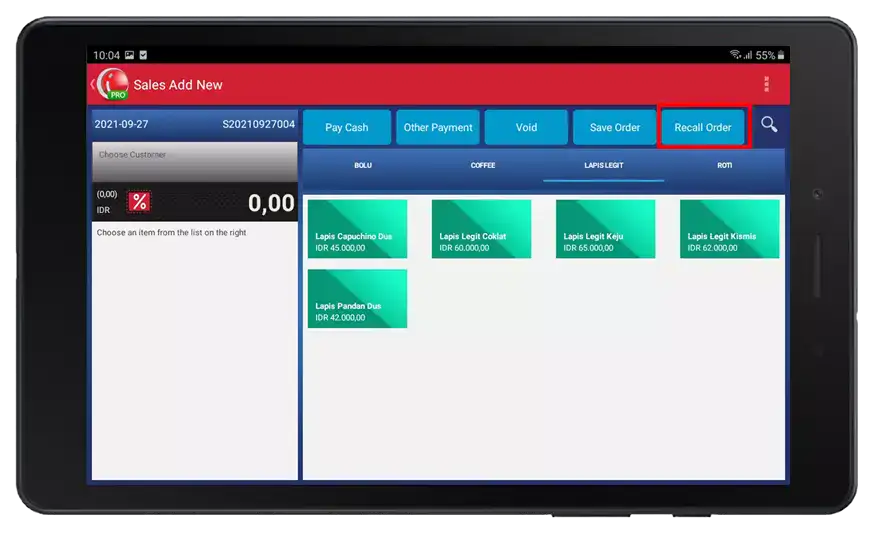
Find and click the order name that matches the customer
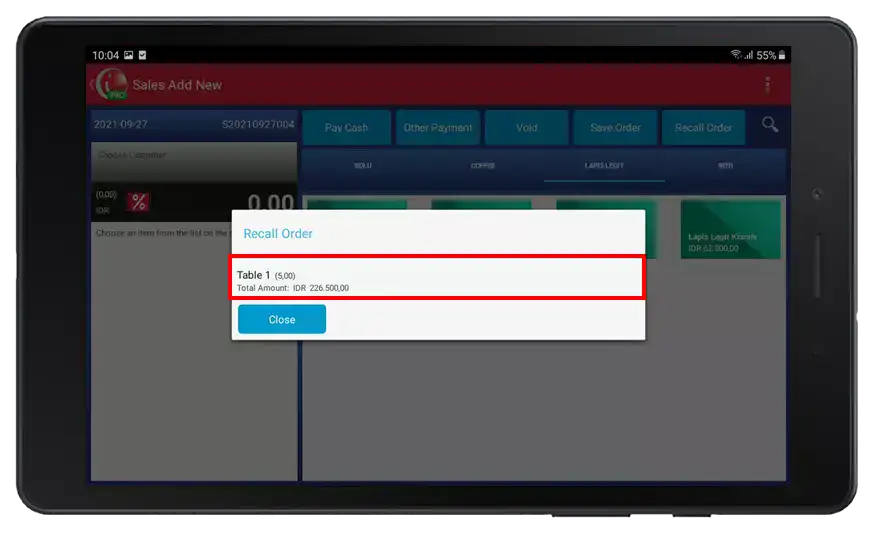
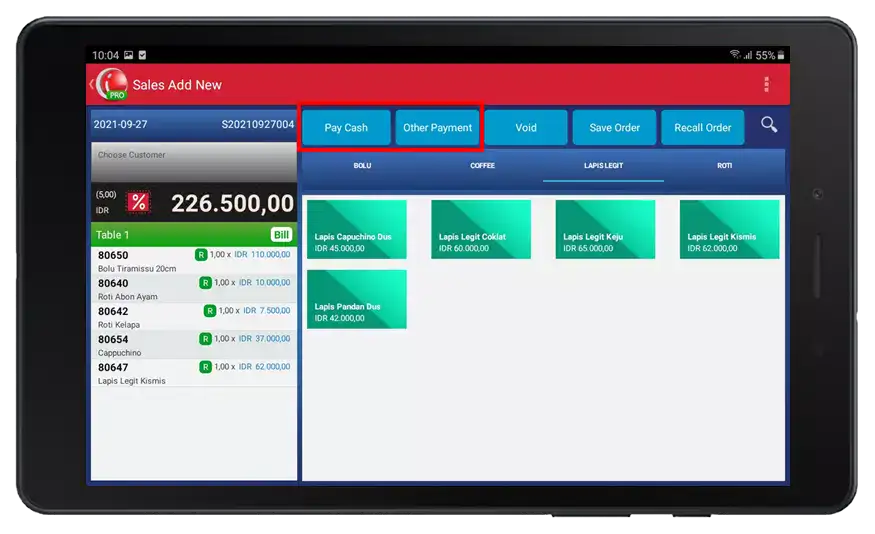
You are directed to the billing menu > click Pay Cash / Other Payments (for example: Pay Cash)
NOTE:
You can print the bill to give to the customer, click ![]() to print
to print
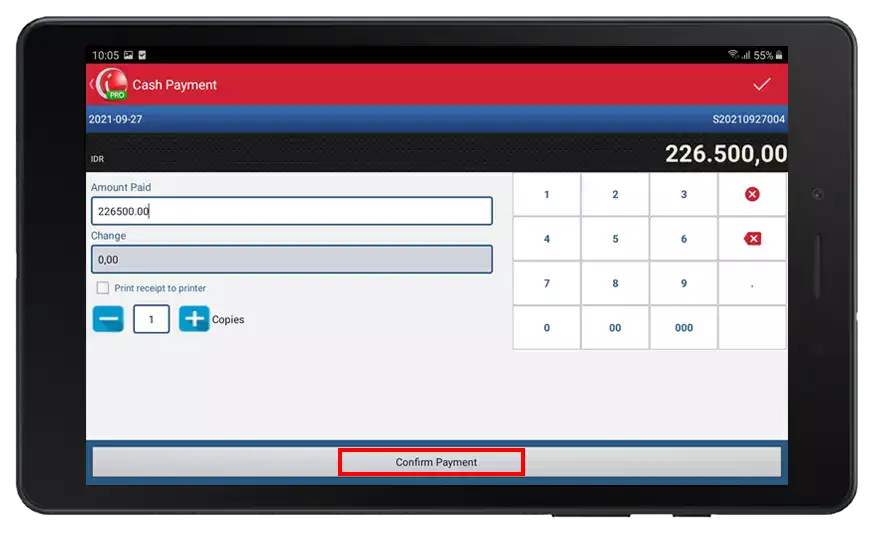
Fill in the amount paid column according to the nominal paid by the customer > click confirm payment
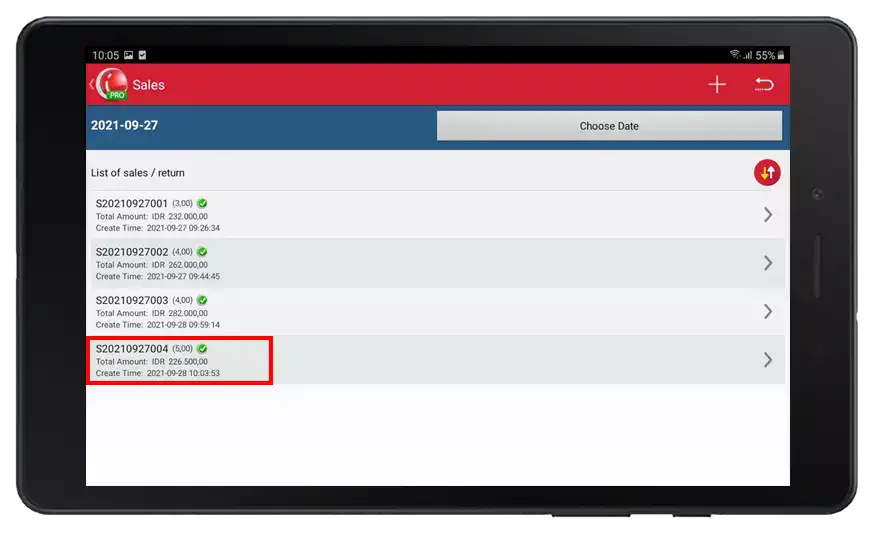
Yeaayyy congratulations you have successfully made a transaction
iREAP POS : iREAP stand for Integrated Retail Application, is an application designed and developed to help you managed and run store operation, consists of Point of Sale / Cashier system and inventory control system.