
Before making a transaction on the iREAP POS application, of course, you must first input the item master data.
Item Master Data Is a place to store information on data items for goods, services, non-inventory, and assembled goods.
iREAP POS Pro provides facilities so that you can input your item/product master data through the web admin.
There are two ways to input goods master data through the web admin. You can use manual input one by one or using the function for import/upload.
NOTE:
How to Import/Upload Master Data Items from CSV or Excel File via Web Admin
What will be done this time is to input the master data items one by one.
Open a browser browser and go to the website www.ireappos.com

Click LOGIN IREAP PRO
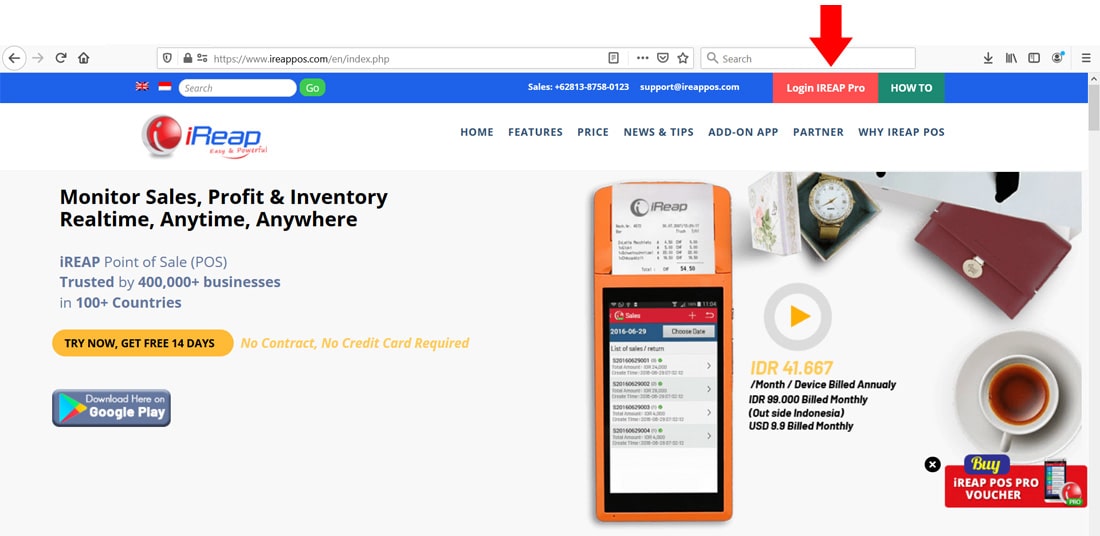
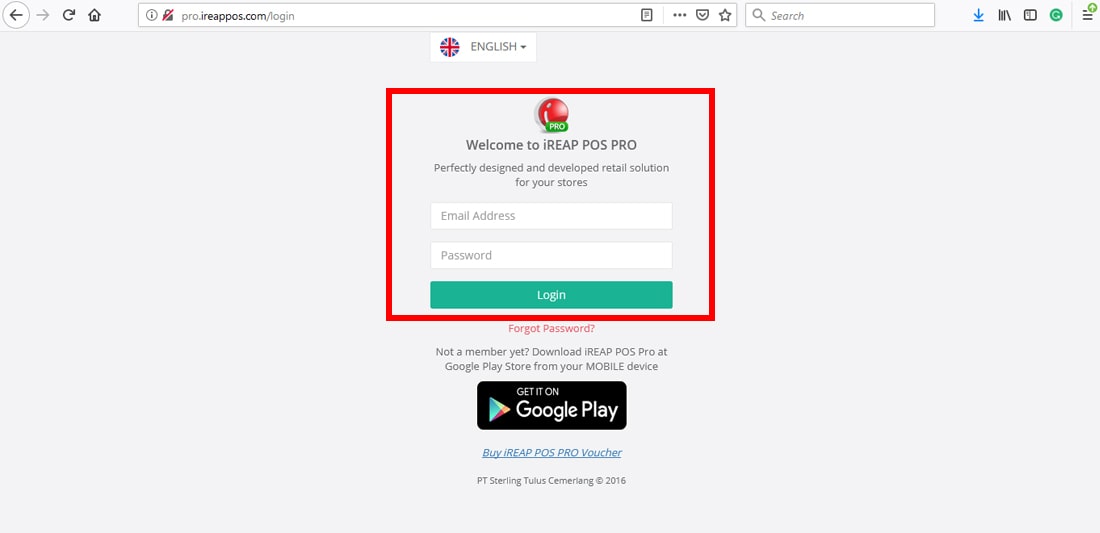
Or else you can also login through the pro.ireappos.com/login directory

Enter your email address and your password (Administrator Account email account that you registered in the first time for using iREAP POS Pro)
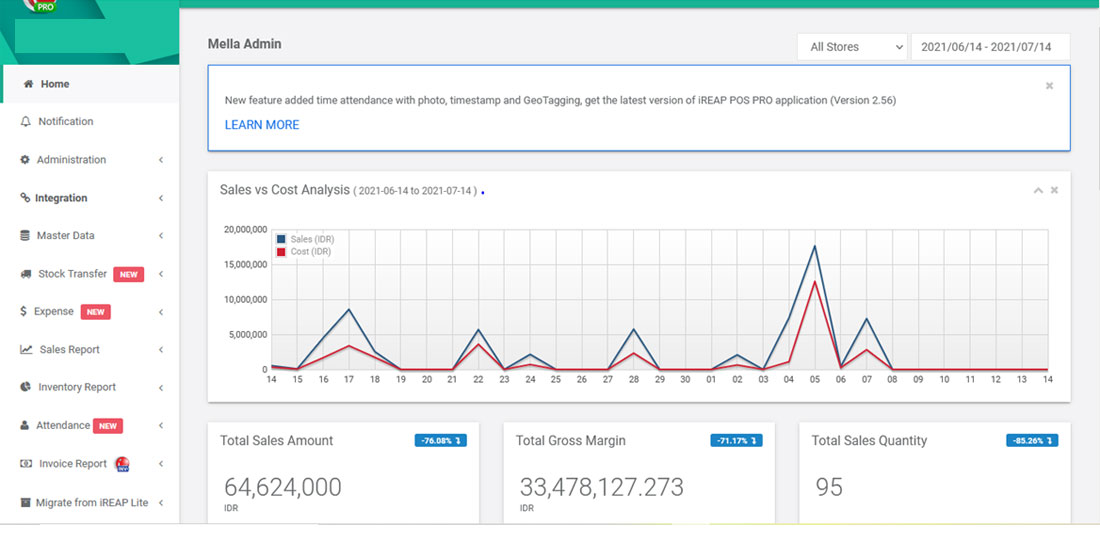
Go to main page of your iREAP POS Pro
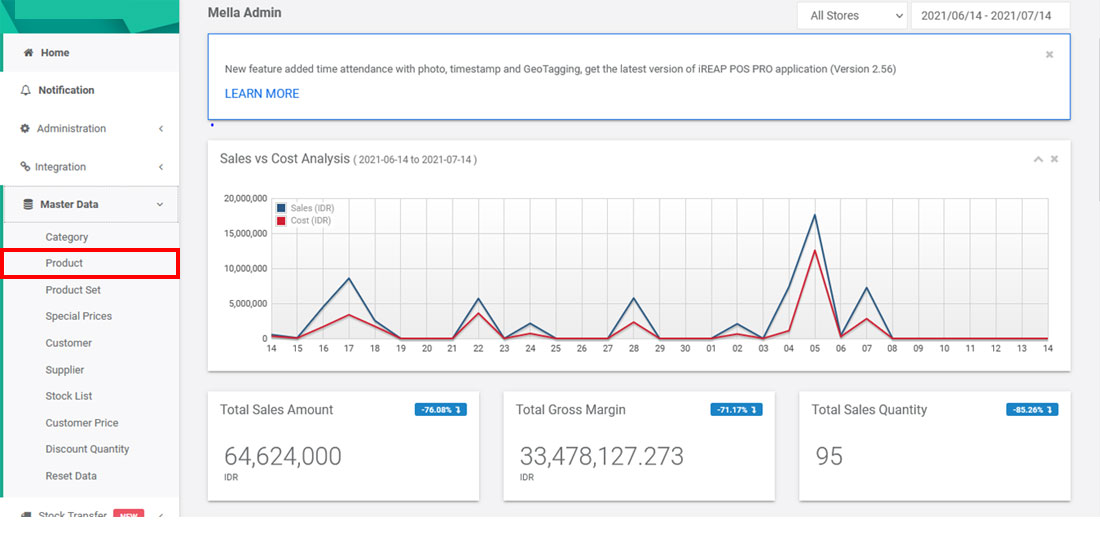
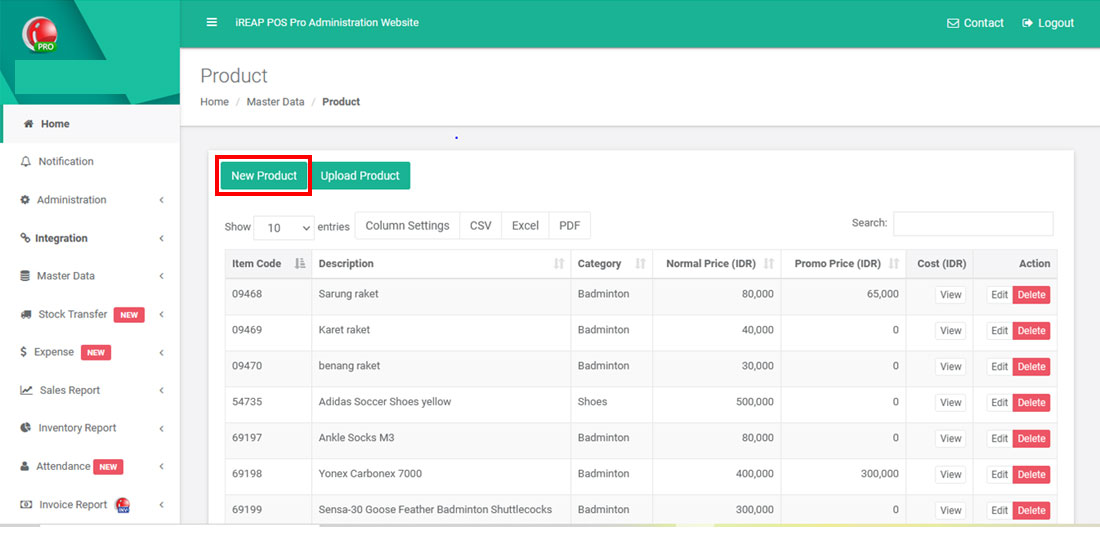
Go to Master Data > Products
Click New Product
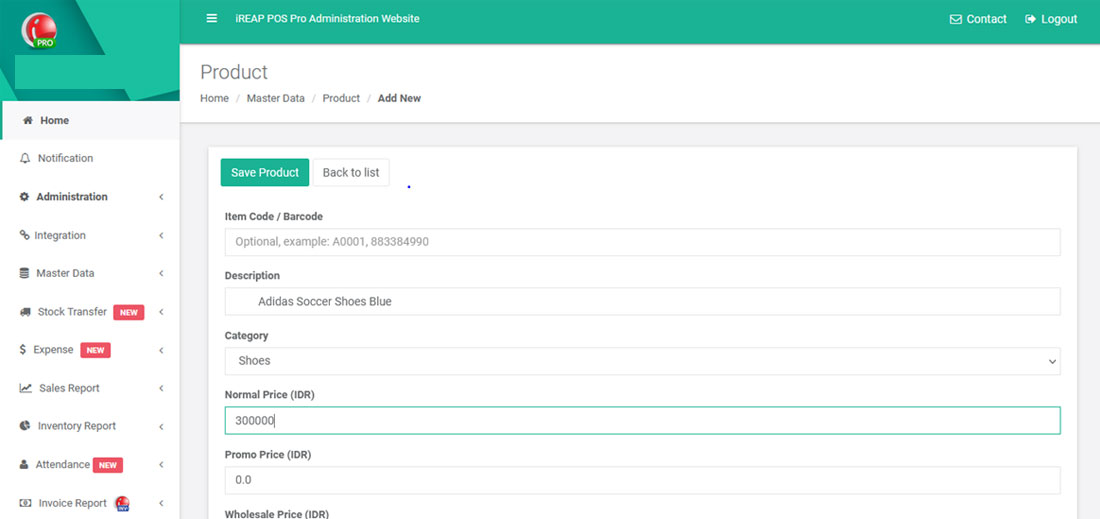
Fill in the item data > Then click Save Product
Category, ItemCode, Description, UnitOfMeasure, NormalPrice, PromoPrice, WholesalePrice, WholesalePromoPrice, Cost, Tax, NonStock, Unsellable, Note, OpenSellingPrice
NOTE:
Required Fields are: Description, Select Category, Normal Price (Rp)
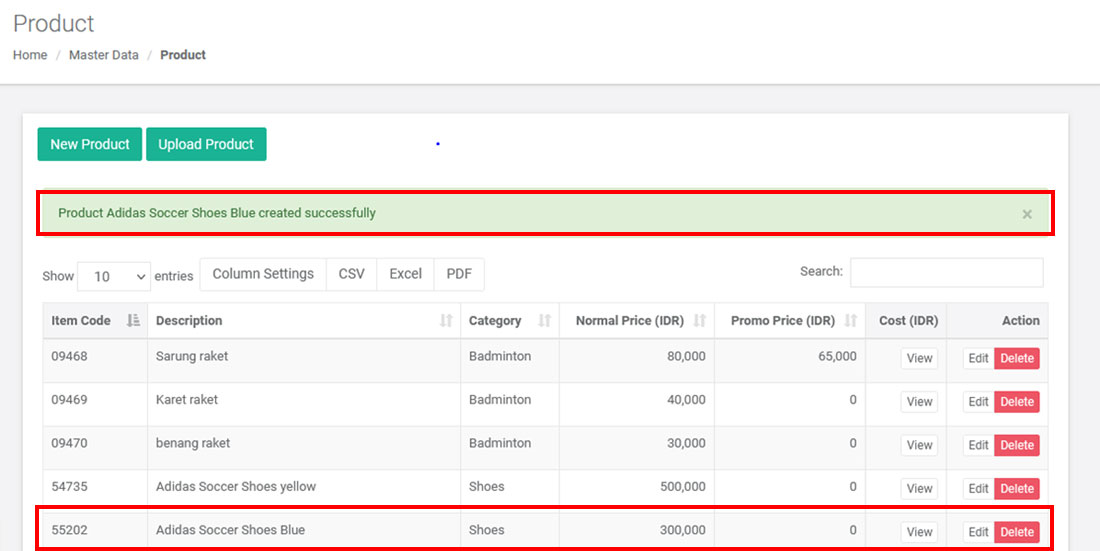
Yeayyyyy!!!! Product created successfully
iREAP POS : iREAP stand for Integrated Retail Application, is an application designed and developed to help you managed and run store operation, consists of Point of Sale / Cashier system and inventory control system.