
| WiFi/LAN Printer Epson TM-T82X | ||
|---|---|---|
| Thermal / DOT Metrix | Thermal | |
| Brand | Epson | |
| Paper Width | 80 mm | |
| Connection | WiFi / LAN | |
| Paper Type | Thermal Paper | |
| Print Logo | Yes | |
| Location to save the Logo | Printer | |
| Autocutter | Yes | |
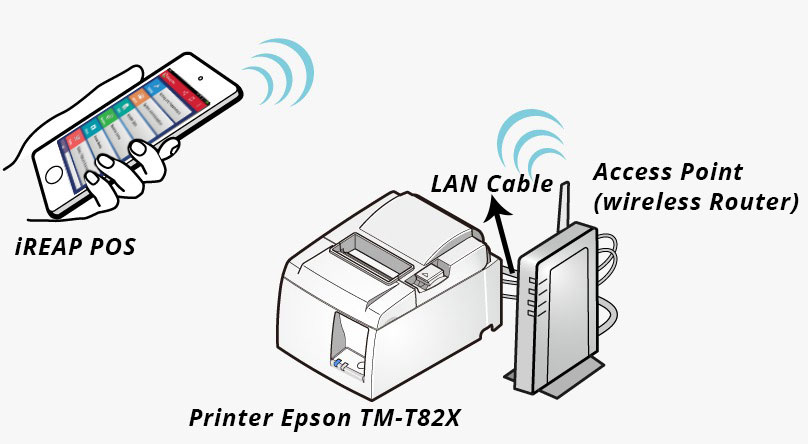
The iREAP POS cashier application now has support for the Epson TM-T28X WIFI / LAN Printer to print sales receipts and print logos. By using the iREAP POS application which now has support for the Epson TM-T82X WIFI / LAN printer, you can improve the performance of your buying and selling transactions to consumers in a more flexible and more accurate manner. iREAP POS is a smart cashier application that has the ability to support your buying and selling activities.
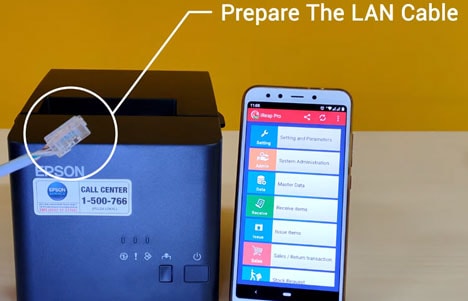
Prepare the LAN cable
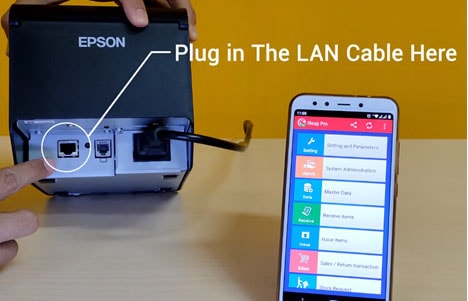
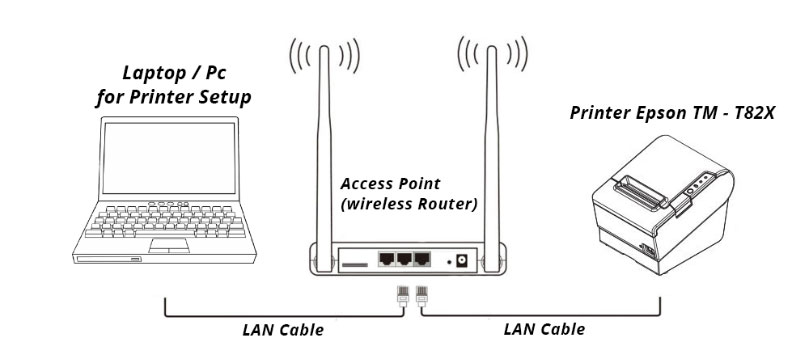
Connect the LAN cable to the slot shown below, and connect to the wireless router that you have
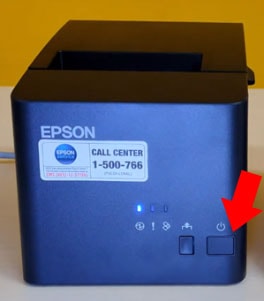
Press the Power button on the Epson TM-T82X WIFI / LAN printer until the indicator light on the printer lights up as shown below
Wait a few moments, the printer will print the IP address automatically if the printer is using DHCP IP. The results can be seen in the image below. It should be noted, if the printer does not use DHCP IP, then the IP Address will not be printed automatically. To know how to change Static IP to DHCP IP, HERE
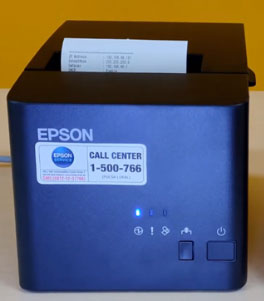
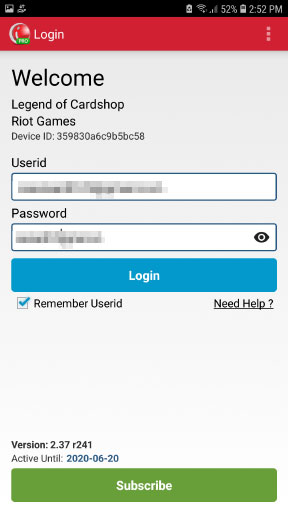
If the IP Address print paper has come out, you can open the iREAP POS PRO application on your device
Enter the Userid and Password that have been registered previously
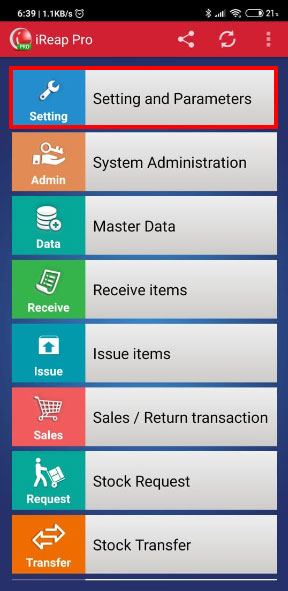
Open the "Setting and Parameters" menu
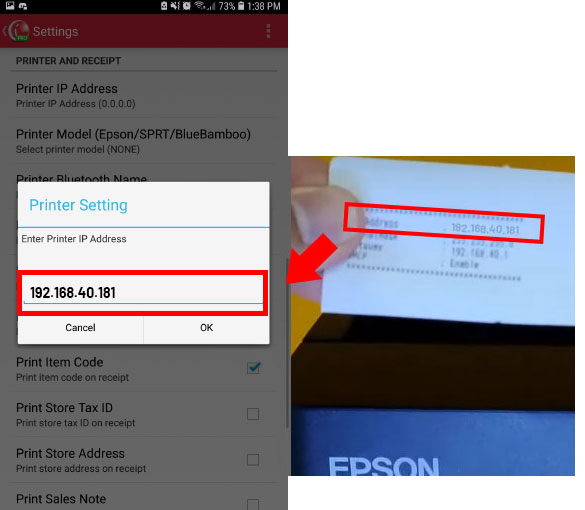
Scroll down until you find the "Printer IP Address" menu and press it
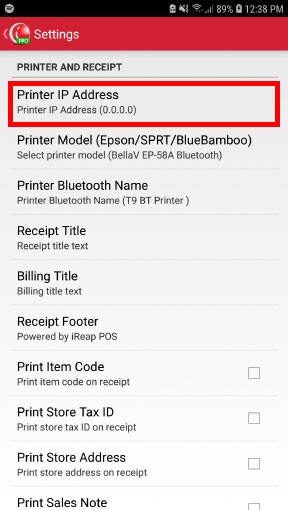
Fill in the Printer IP Address field with the same IP Address on the previous IP Address print paper
NOTE:
Try to connect the device to the same network as the Epson TM-T82X WIFI / LAN printer because if the device is not in the same network as the printer, the setting will not work
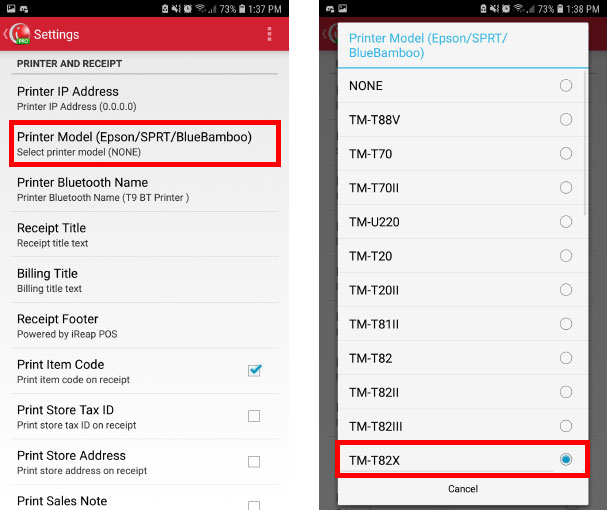
Select the "Printer Model" menu and select the printer model (TM-T82X). The image below is an example
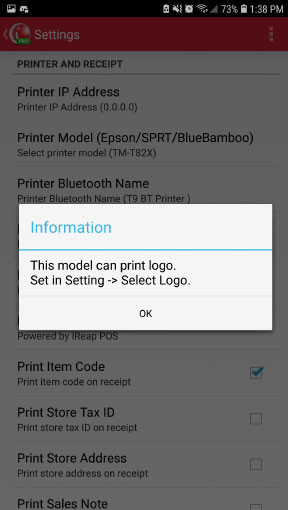
A notification will appear as shown below, press OK
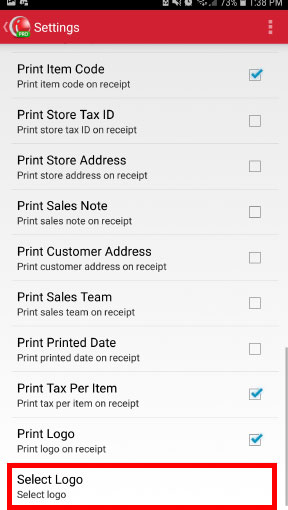
Scroll down until you find the "Print Logo" menu, check the "Print Logo" menu
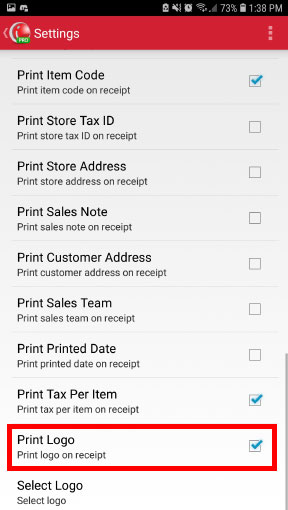
Select the "Select Logo" menu to select the logo image you want to print on the receipt. When you choose a logo, please make sure that the size of the logo image selected is 360px so that the logo can be printed properly.
If the printer settings have been completed, you can continue to use iReap POS to record your sales transactions. Details about recording sales transactions can be seen in the following link :
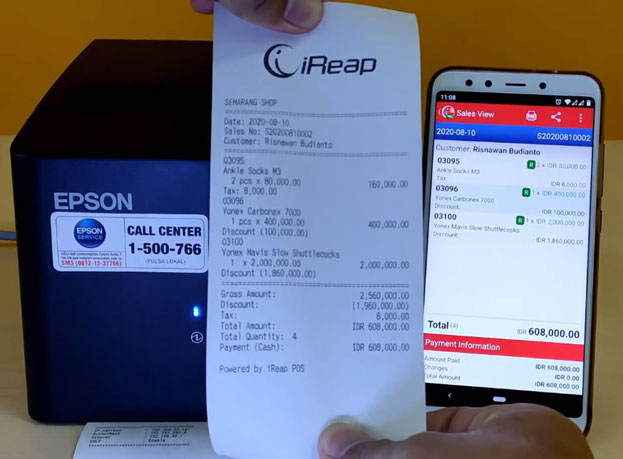
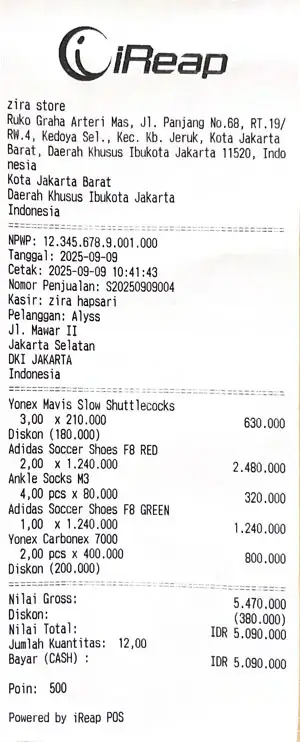
The printer will print the receipt automatically according to the transaction that you have entered on iREAP POS PRO along with the logo you have previously selected
Turn on the Epson TM-T82X WIFI / LAN Printer
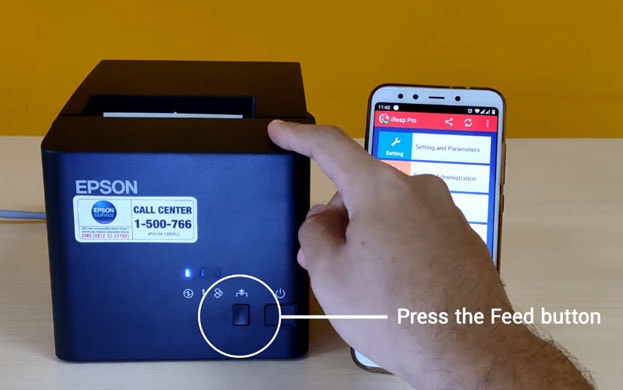
Press the "Feed" button to issue a print out of the printer IP address setting
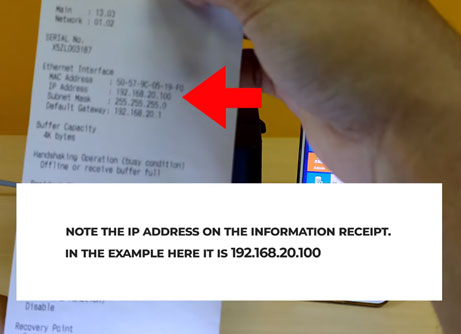
Please remember the IP address attached to the printed paper that was just printed when you pressed the Feed button. An example is like the image below
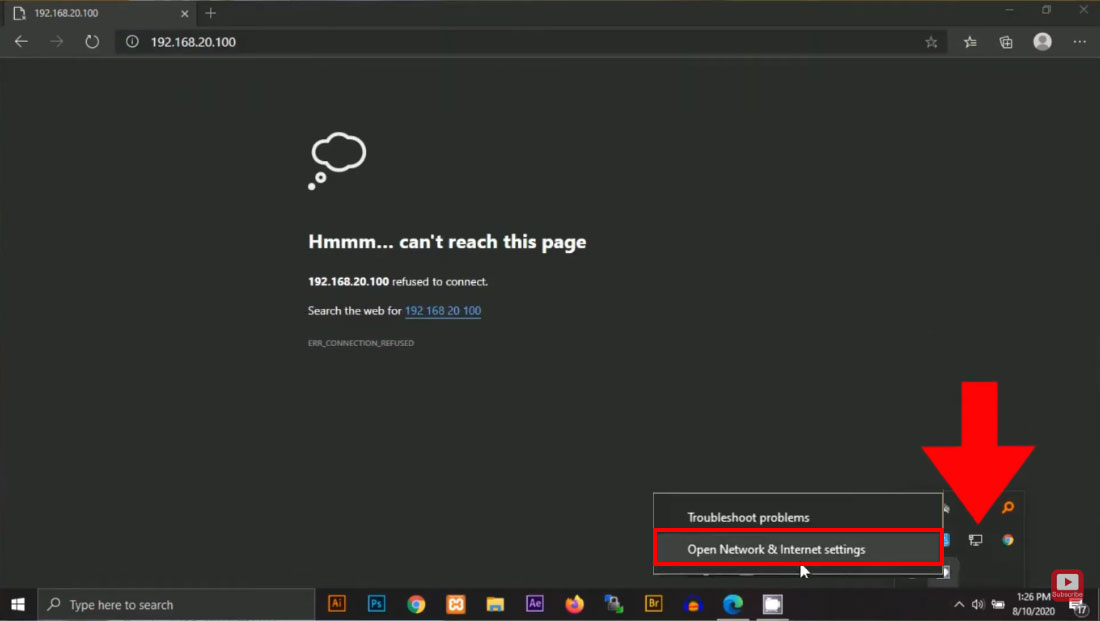
Right click the icon "Internet Access" then choose "Open Network and Sharing Center" on your Laptop/PC
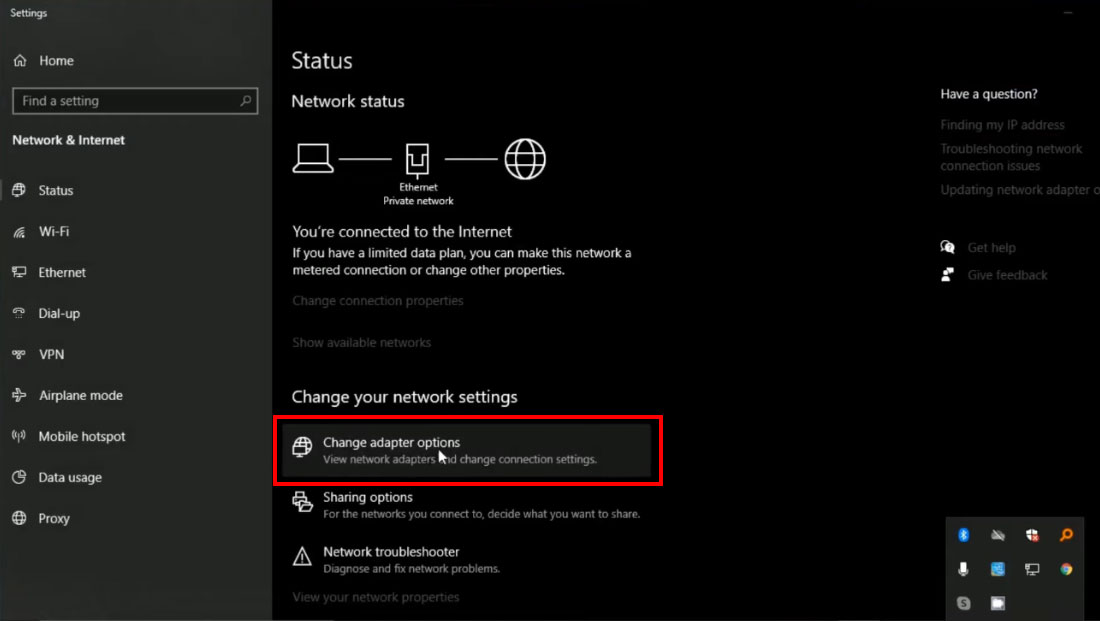
Open Change Adapter Settings
Select the Laptop / PC network connected to the Access Point or Wireless Router which your Epson TM-T82X WIFI / LAN Printer also connects to. Here's an example image below
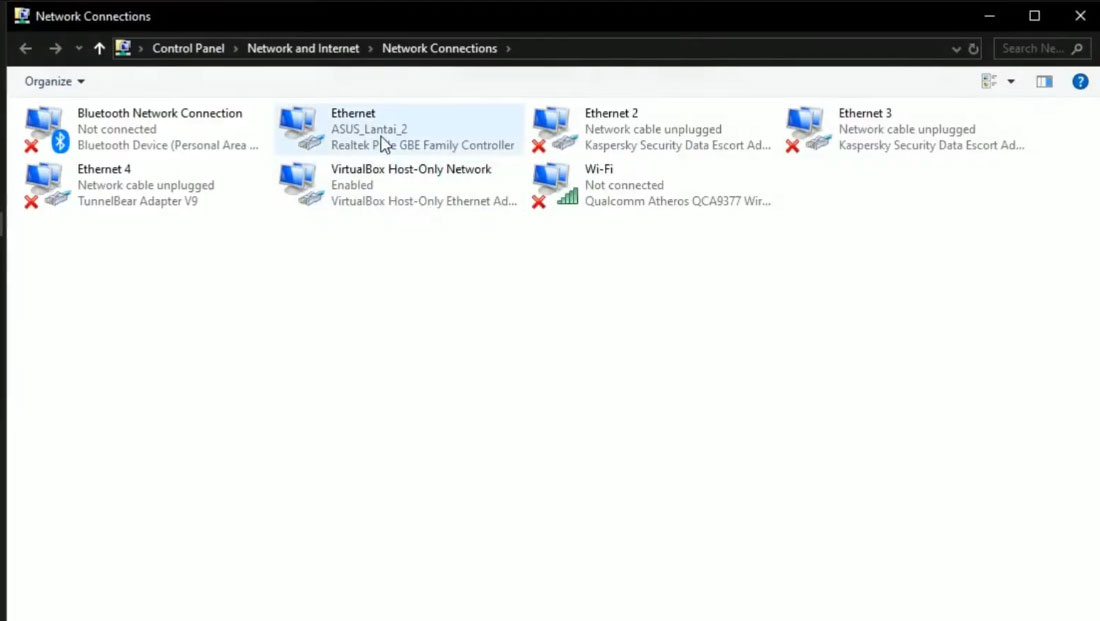
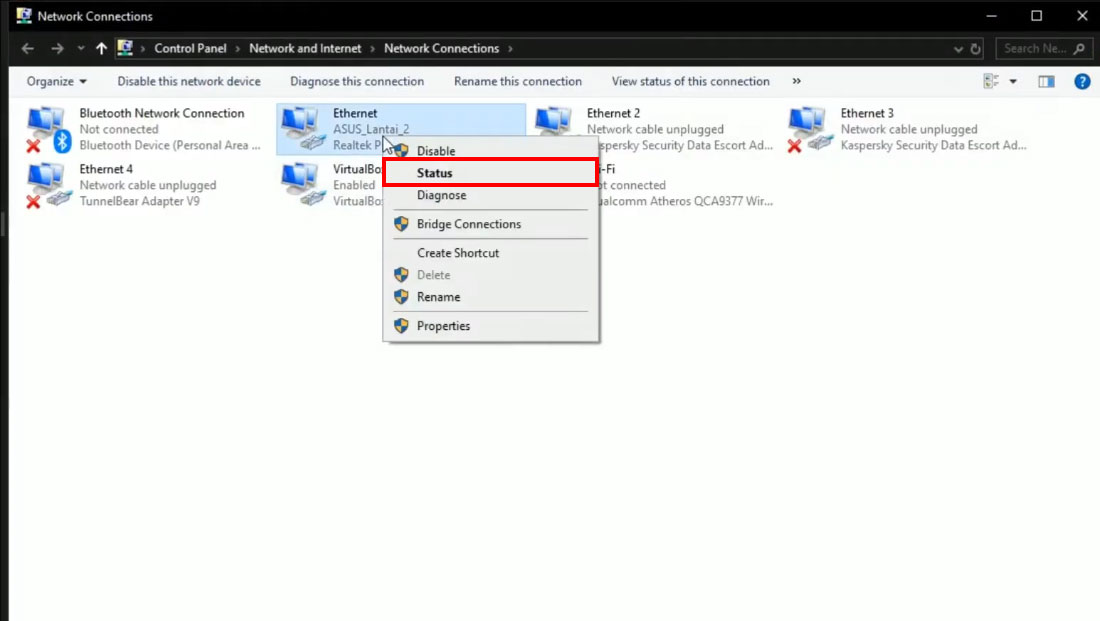
Right click then Click Status
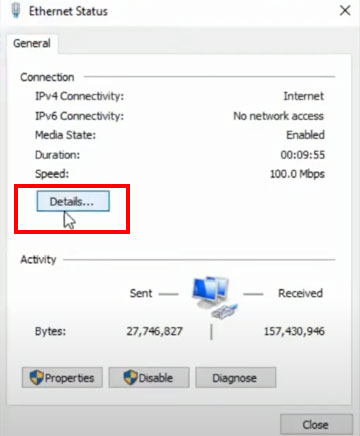
Click Details
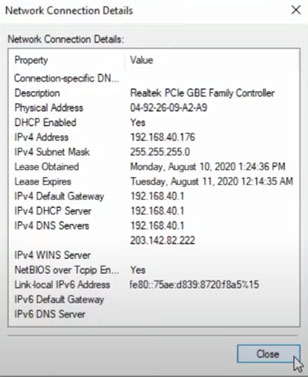
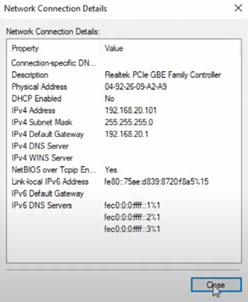
You can see the initial IP Address setting on the Laptop / PC. After that press Close
Click Properties
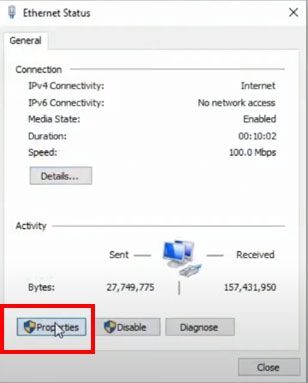
Select Internet Protocol Version 4 (TCP / IPv4) and click Properties
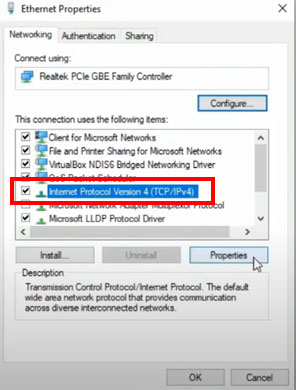
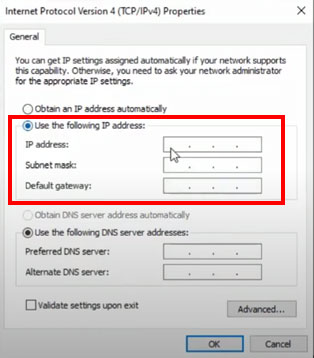
Check Use the following IP Address, then follow the steps below:
When finished, press OK
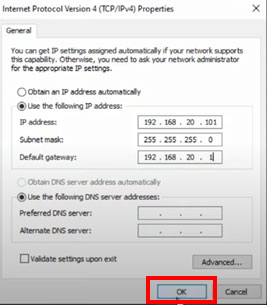
You may close, and when you repeat steps 8-9, the IP address setting has changed
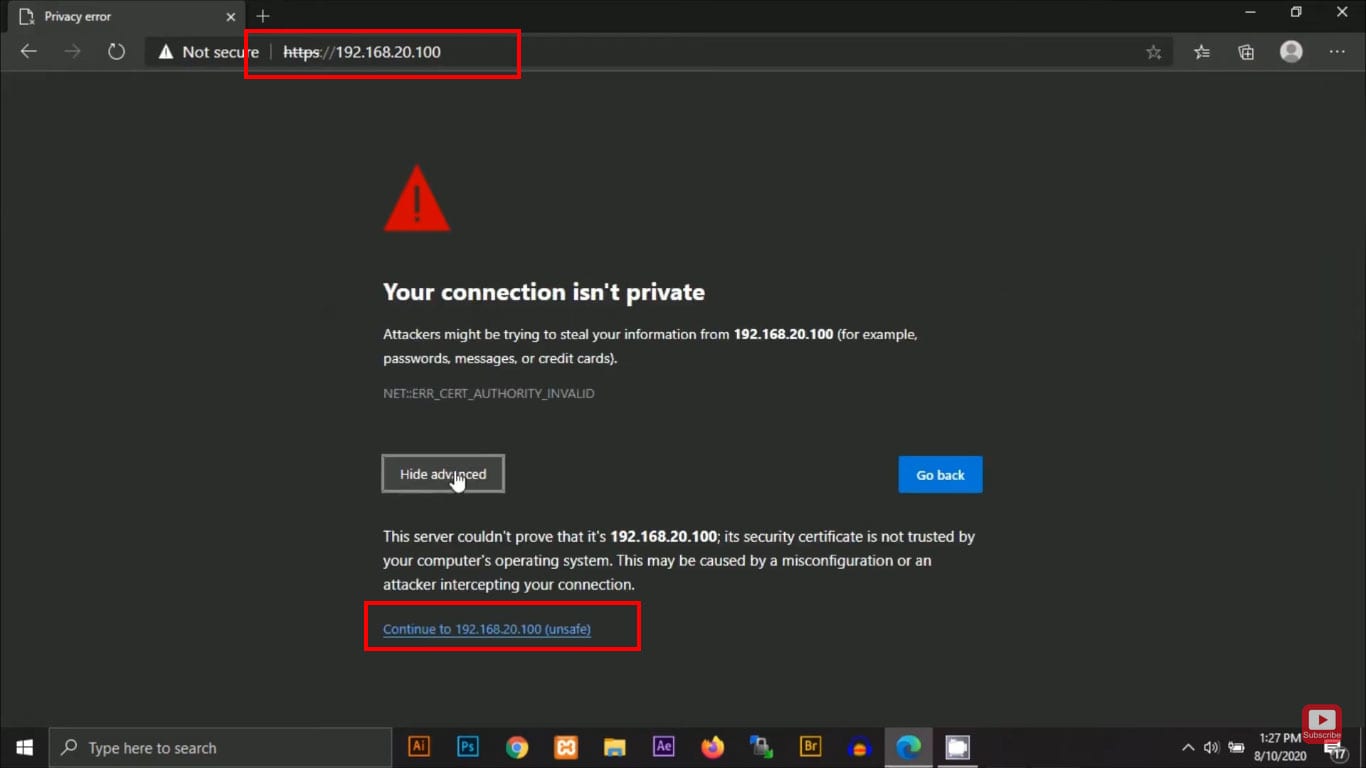
Open your browser, and type the IP Address of the Printer as it appears on the print paper
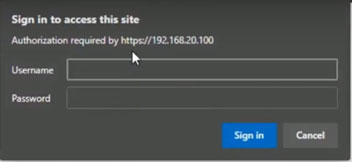
Enter your Username and Password (Defaul Username: EPSON; Default Password: EPSON)
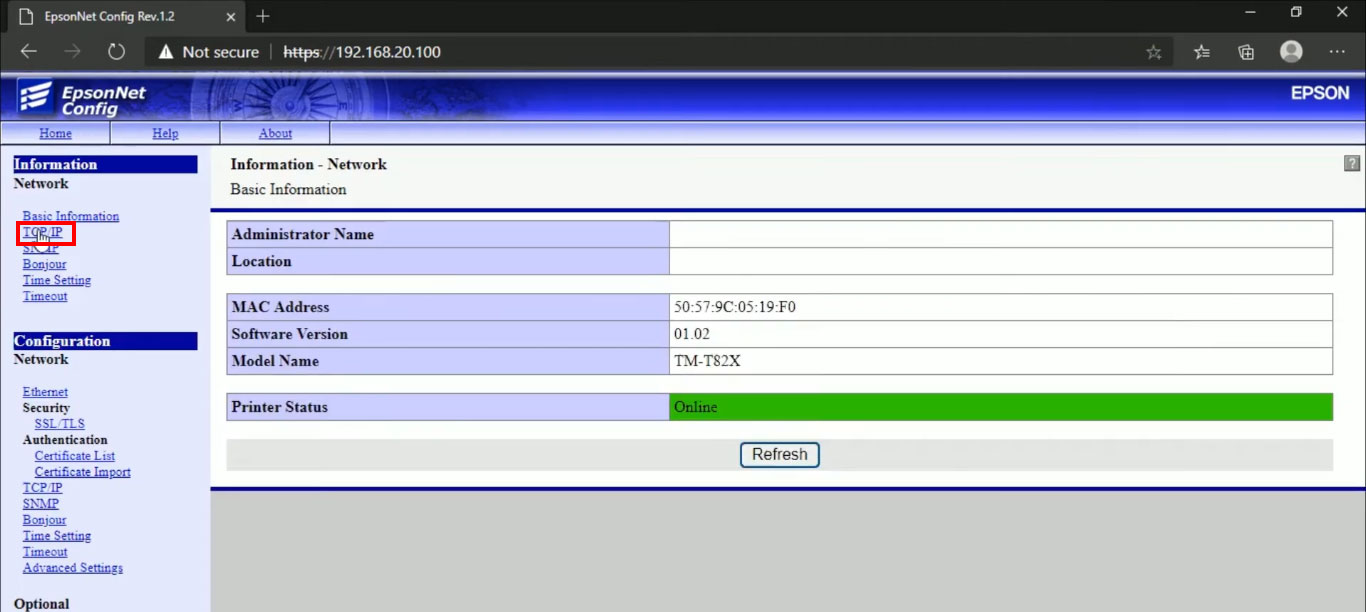
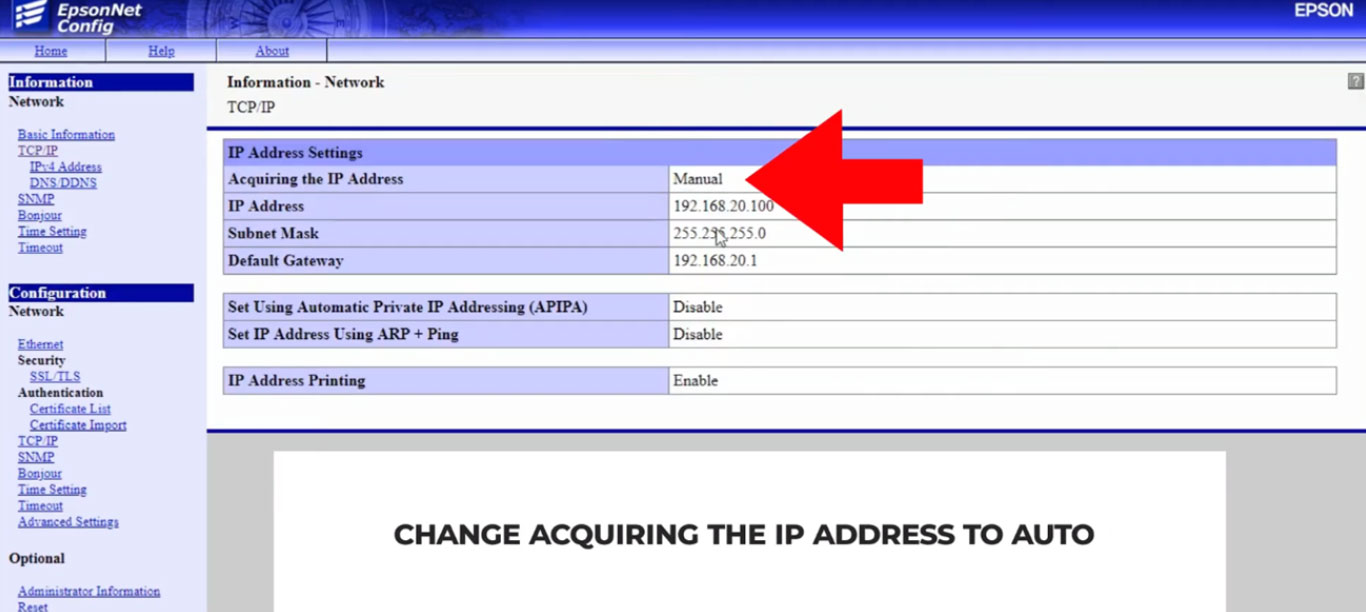
Click TCP/IP
Change Acquiring the IP Address from Manual to Auto
Click Send

Wait until the website is reset again. If the website has finished resetting automatically, the browser can be closed
On the Epson TM-T82X WIFI / LAN printer, turn it off first then turn on the printer again.
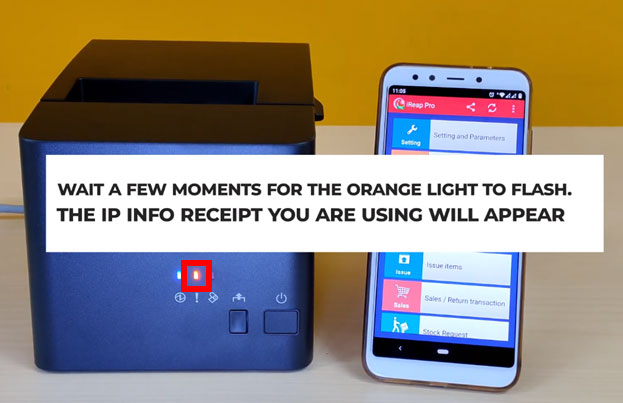
Wait a few moments until the indicator light flashes indicating that the print paper containing the IP address information will come out
iREAP POS : iREAP stand for Integrated Retail Application, is an application designed and developed to help you managed and run store operation, consists of Point of Sale / Cashier system and inventory control system.